How to Connect to Docker with C#
Introduction
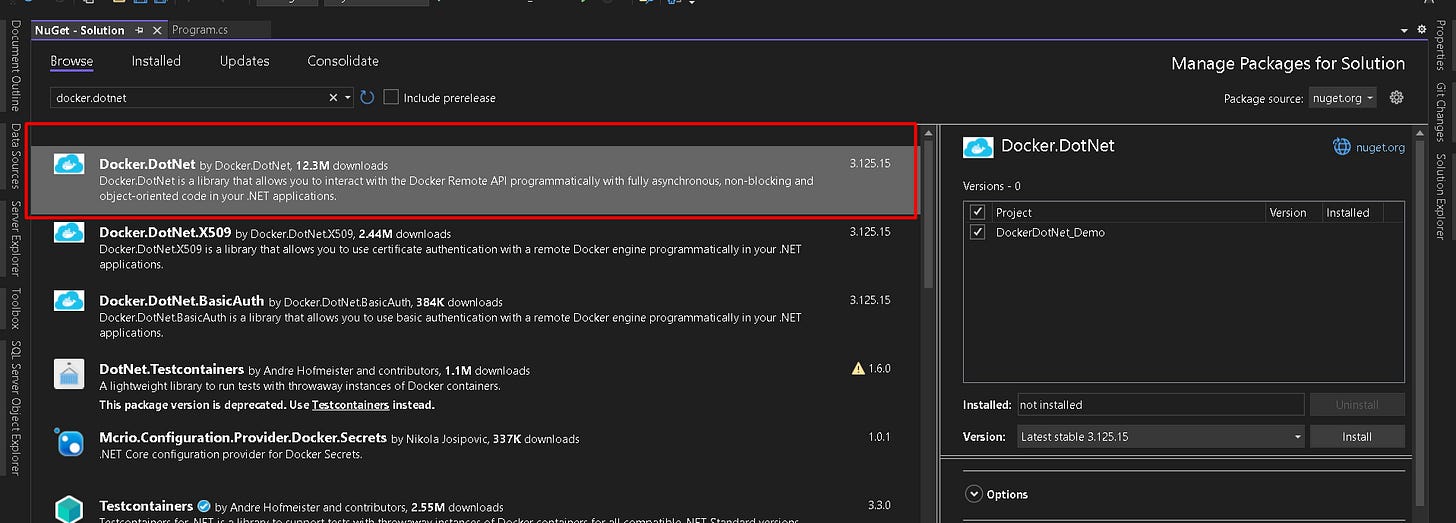
In this blog post, I will be providing a demonstration of how to interact with Docker using C# and Windows. Docker provides an API for interacting with Docker engine, containers and images but has relatively cryptic documentation on how to access the API in a Desktop environment. The easiest solution to communicate between Docker and .NET is to use the Docker.DotNet NuGet package, which I will explain how to use in this post.
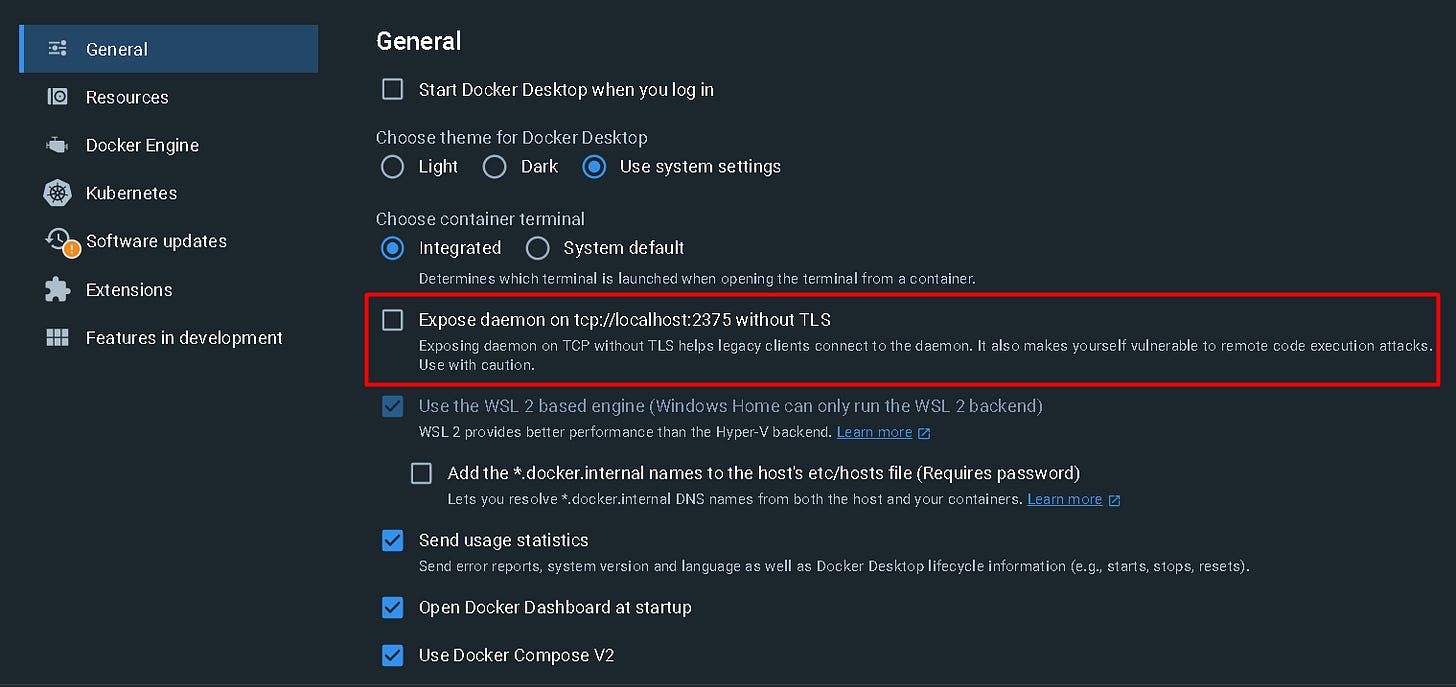
To expand on what I mentioned earlier about the cryptic official Docker documentation - when browsing the General FAQs for Desktop, you may read this:
Docker Desktop Windows users can connect to the Docker Engine through a named pipe: npipe:////./pipe/docker_engine, or TCP socket at this URL: tcp://localhost:2375You do not need to explicitly do any of this. When I was working on a project that required communicating with Docker via the API, I spent a few hours researching how to do this until I came across Docker.DotNet which handles all of these communications for you. You especially do not need to open port 2375 or enable this option to expose the daemon on this port in Docker Desktop settings. As stated in the Docker Desktop settings themselves, this can make yourself vulnerable to remote code execution attacks. An interesting whitepaper on this topic has been published by Aqua Security and can be read here: Well, That Escalated Quickly! How Abusing Docker API Led to Remote Code Execution, Same Origin Bypass and Persistence in The Hypervisor via Shadow Containers.

Creating the Console Application
To follow along with this tutorial, ensure you have the following downloaded and/or installed:
Visual Studio (I'm using 2022 edition here)
Docker Desktop - ensure it is running before executing the .NET application. I am running mine on Windows.
Latest MongoDb Docker image
For this demonstration, I will be creating a simple .NET 7.0 console application. After creating the application, I will install the latest stable version of Docker.DotNet via NuGet.
Creating and Starting the Docker Container
After successfully installing the NuGet package and including the using Docker.DotNet statement in Program.cs, you first need to declare a DockerClient object. This client will be responsible for all interactions with Docker such as creating the container, starting and stopping it, etc.
var client = new DockerClientConfiguration().CreateClient();Next is to create the container. For this example, I will be using the latest MongoDb image. To create the container, use this command:
var containerCreationResponse = await client.Containers.CreateContainerAsync(new CreateContainerParameters {
  Image = "mongo",
    Name = "mongodb-container",
    ExposedPorts = new Dictionary <string, EmptyStruct> {
      {
        "27017/tcp",
        default (EmptyStruct)
      }
    },
    HostConfig = new HostConfig {
      PortBindings = new Dictionary < string, IList <PortBinding>> {
        {
          "27017/tcp",
          new List <PortBinding> {
            new PortBinding {
              HostPort = "27017"
            }
          }
        }
      }
    }
});
This command creates a new container using the mongo image, names it mongodb-container, exposes port 27017 within the container, and maps it to port 27017 on the host. The equivalent Docker command would be:
docker run -d --name mongodb-container -p 27017:27017 mongoYou may notice in Docker Desktop that the container is created but not yet started. To start the container, use this command:
await client.Containers.StartContainerAsync(containerCreationResponse.ID, null);The containerCreationResponse.ID argument is the ID of the container assigned by Docker during its creation. This is the same ID that is displayed if you run the command docker ps -a in a terminal.
Attaching to the Container and Inserting a Document into MongoDb
Now that the container is created and running, we can start to interact with it. The following code is used to insert a single document into a collection:
var createAndSeedDbCommands = new [] {
    "mongosh",
    "--eval",
    "db = db.getSiblingDB('TestDb'); db.TestCollection.insertOne({ id: 1, currentDateTime: new Date() });"
};

var createAndSeedDbExecCreateResponse = await client.Exec.ExecCreateContainerAsync(containerCreationResponse.ID,
    new ContainerExecCreateParameters() {
        AttachStderr = true,
            AttachStdout = true,
            Cmd = createAndSeedDbCommands,
            Tty = false
    });

await client.Exec.StartAndAttachContainerExecAsync(createAndSeedDbExecCreateResponse.ID, false);
Here’s a detailed explanation of each part of the code:
The
createAndSeedDbCommandsarray contains themongoshcommand and its arguments. The--evaloption is used to specify a JavaScript expression to evaluate. In this case, we use it to execute a series ofmongoshcommands that create a new database named"TestDb", create a new collection named"TestCollection", and insert a new document with an"id"field set to1and a"currentDateTime"field set to the current date and time.The
ExecCreateContainerAsyncmethod is called on theclient.Execobject to create an exec instance within the specified container. An exec instance allows you to run a command within a running container, similar to using thedocker execcommand. ThecontainerCreationResponse.IDparameter specifies the ID of the container in which to create the exec instance, and theContainerExecCreateParametersobject specifies the options for creating the exec instance, such as attaching to the standard error and standard output streams, and setting the command to execute.The
StartAndAttachContainerExecAsyncmethod is called on theclient.Execobject to start the created exec instance and attach to its standard error and standard output streams. ThecreateAndSeedDbExecCreateResponse.IDparameter specifies the ID of the exec instance to start, and thefalseparameter indicates that the method should not return until the exec instance has completed.
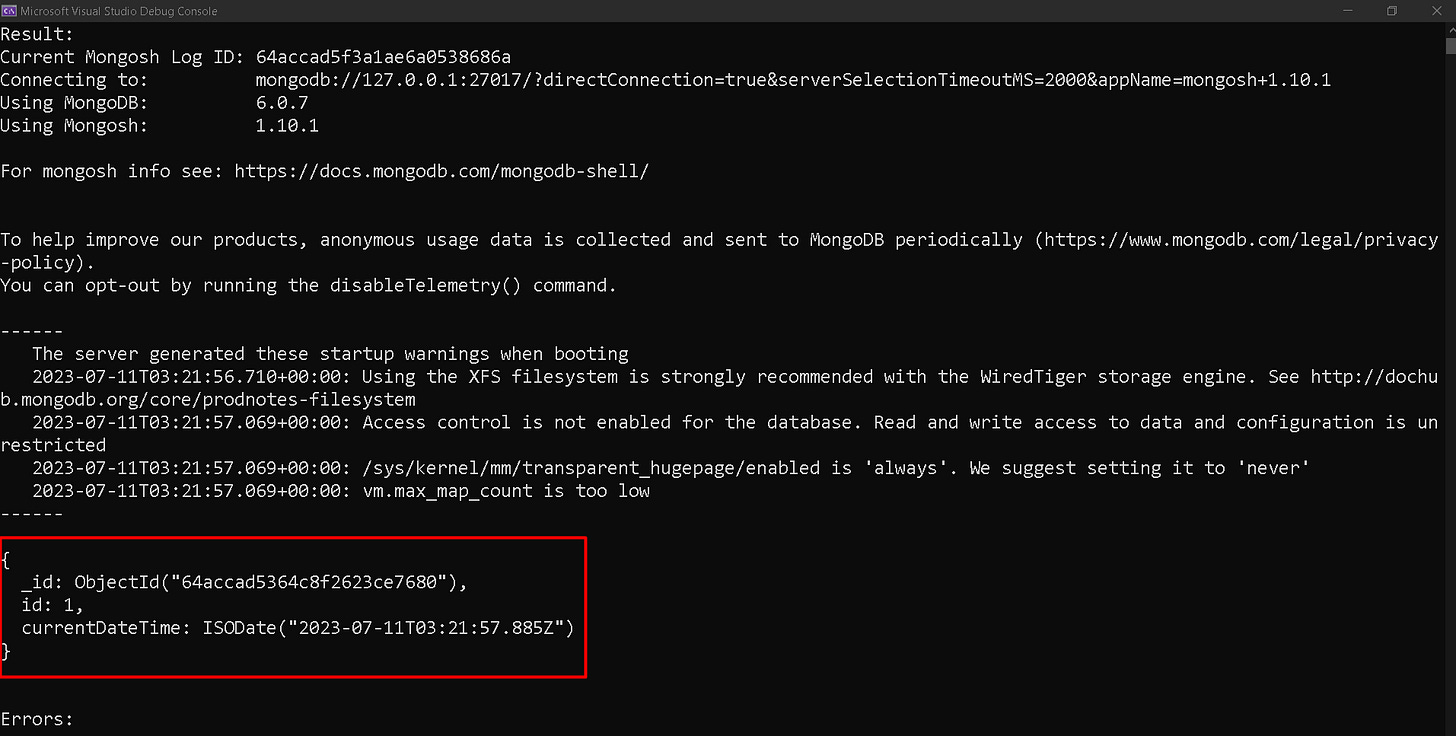
After this code has been executed, a new database named "TestDb" will be created within the MongoDB instance running in the specified container, along with a new collection named "TestCollection" containing a single document with an "id" field set to 1 and a "currentDateTime" field set to the current date and time.
Querying MongoDb
Now that a database and collection exists with a single document, we can experiment with printing out the result of a query against the database. This code is mostly the same as the previous section, though here the StartAndAttachContainerExecAsync method is called to start the exec instance and attach to its standard output and standard error streams. The output of the command is read from the streams using the ReadOutputToEndAsync method and stored in a tuple containing the standard output and standard error strings.
var retrieveDbContentsCommands = new [] {
    "mongosh",
    "--eval",
    "db = db.getSiblingDB('TestDb'); db.TestCollection.find().forEach(printjson);"
};

var retrieveDbContentsExecCreateResponse = await client.Exec.ExecCreateContainerAsync(containerCreationResponse.ID,
    new ContainerExecCreateParameters() {
        AttachStderr = true,
            AttachStdout = true,
            Cmd = retrieveDbContentsCommands,
            Tty = false
    });

(string stdout, string stderr) result;

using(var stream = await client.Exec.StartAndAttachContainerExecAsync(retrieveDbContentsExecCreateResponse.ID, false)) {
    result = await stream.ReadOutputToEndAsync(CancellationToken.None);
}

Console.WriteLine("Result:");
Console.WriteLine(result.stdout);
Console.WriteLine();
Console.WriteLine("Errors:");
Console.WriteLine(result.stderr);
Retrieving Volume Information
You can inspect your containers using the method. This can be used to obtain information like the container name, id, image name, hostname path, etc.
It can also be used to retrieve the container volume information. For example, the following code will print out the id of the first anonymous volume associated with our mongo container:
var container = await client.Containers.InspectContainerAsync(containerCreationResponse.ID);

var volume = container.Mounts.First().Name;

Console.WriteLine($"Volume: {volume}");
Here's a bonus hint: on Windows, you can also view all of your Docker information by navigating to \wsl$\docker-desktop-data\data\docker in File Explorer. This will show all of your containers, volumes, and everything else you can imagine. This is also a really convenient way to transfer files in/out of your anonymous volumes.
Stopping and Deleting Containers
The following code shows how to stop and delete your containers using Docker.DotNet:
await client.Containers.KillContainerAsync(containerCreationResponse.ID, new ContainerKillParameters()); // Stops container.

await client.Containers.PruneContainersAsync(); // Deletes ALL stopped containers.
That concludes everything I have to show for this demonstration. The complete source code can be found on my GitHub here.


